
Layers
The launch explainer for Layers, a new feature on Envato.com.
My Role
I came in as the design engineer once a proof of concept was already running in the browser. My job was to help refine the implementation and change the design, and I did a lot of that by building small HTML prototypes so I could feel the interaction details before anyone wrote production code.
Overview
Layers splits a generated image into separate layers you can move, scale, rotate, reorder and edit with AI. It's a new feature on Envato.com, built for the moment when you love most of an image but want to change just one part of it.
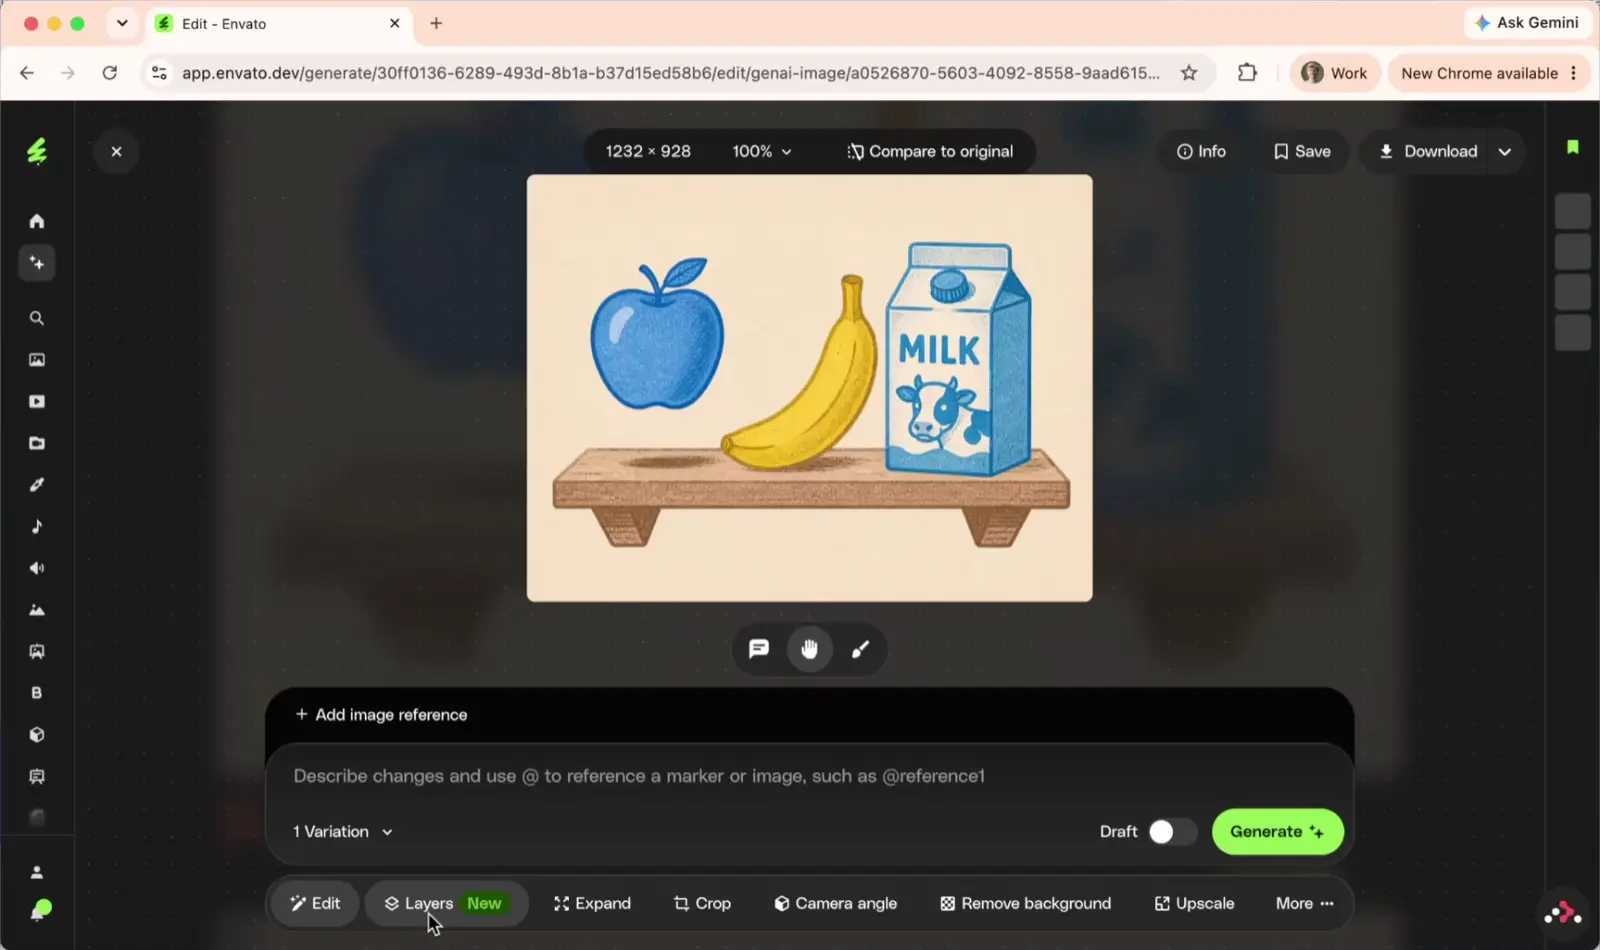
Layers lives in the image editor's toolbar, alongside Edit, Expand and Crop.
- Title
- Design engineer
- Team
- Fraser, Keenan and me, with the wider team
- Time
- August 2026
Situation
When people generate images, they often want to adjust just one part of the result. Maybe the composition is right but one object is the wrong colour, or it's sitting in the wrong spot. Having to regenerate the whole image to fix one small thing is a blunt tool, and you can easily lose the parts you liked.
The idea behind Layers was simple to say and hard to do well: break the image into discrete layers, so each part can be worked on by itself.
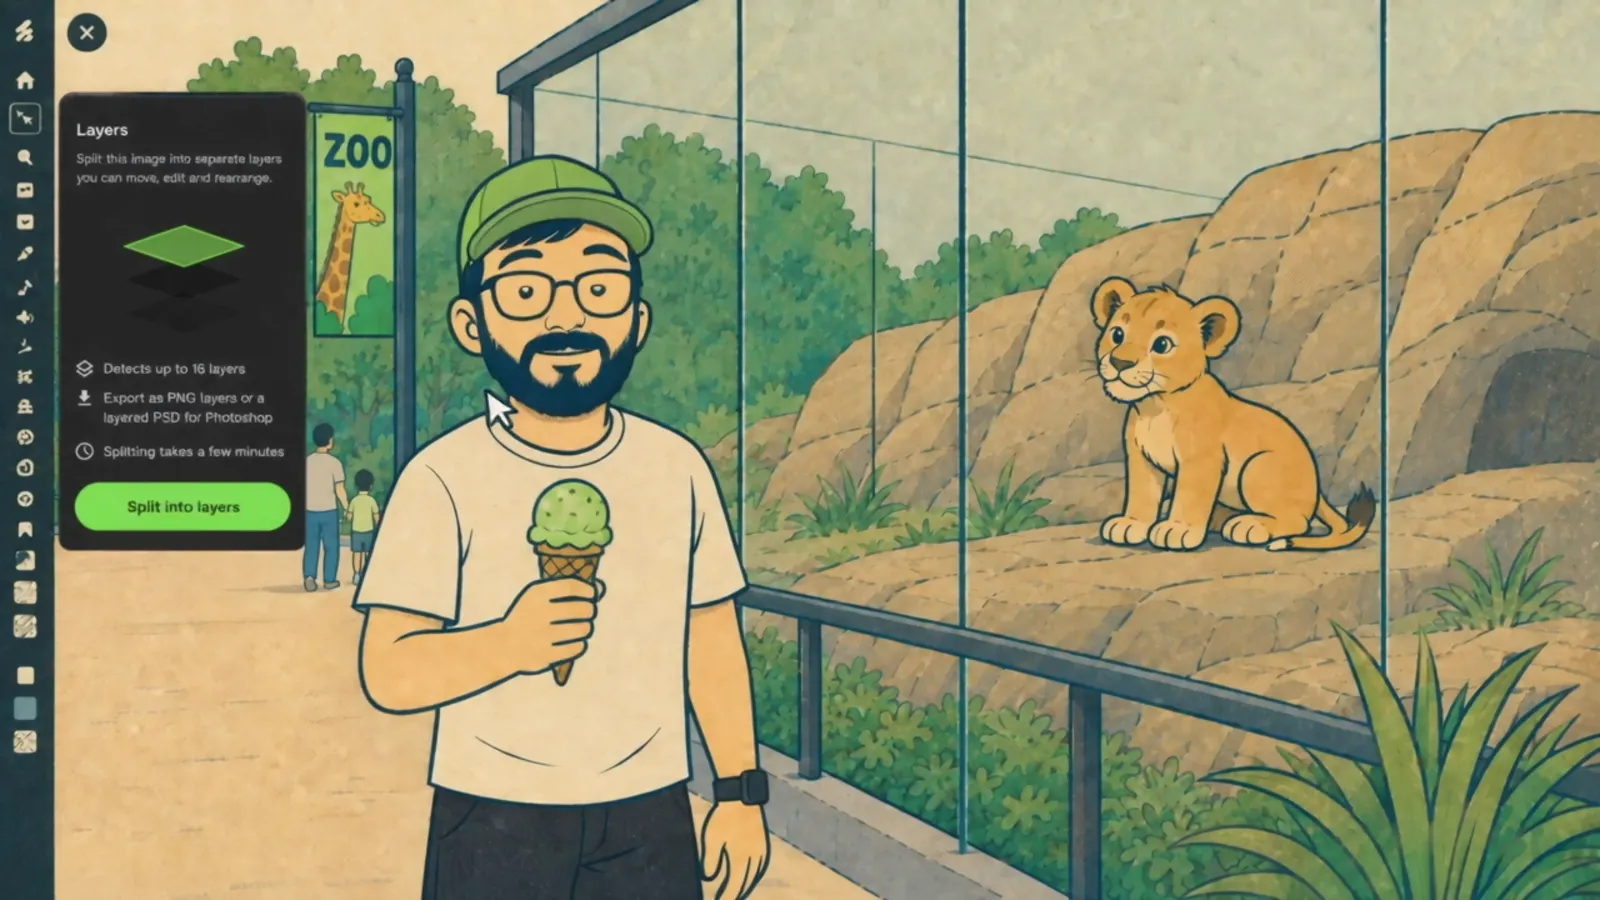
“Split this image into separate layers you can move, edit and rearrange.”
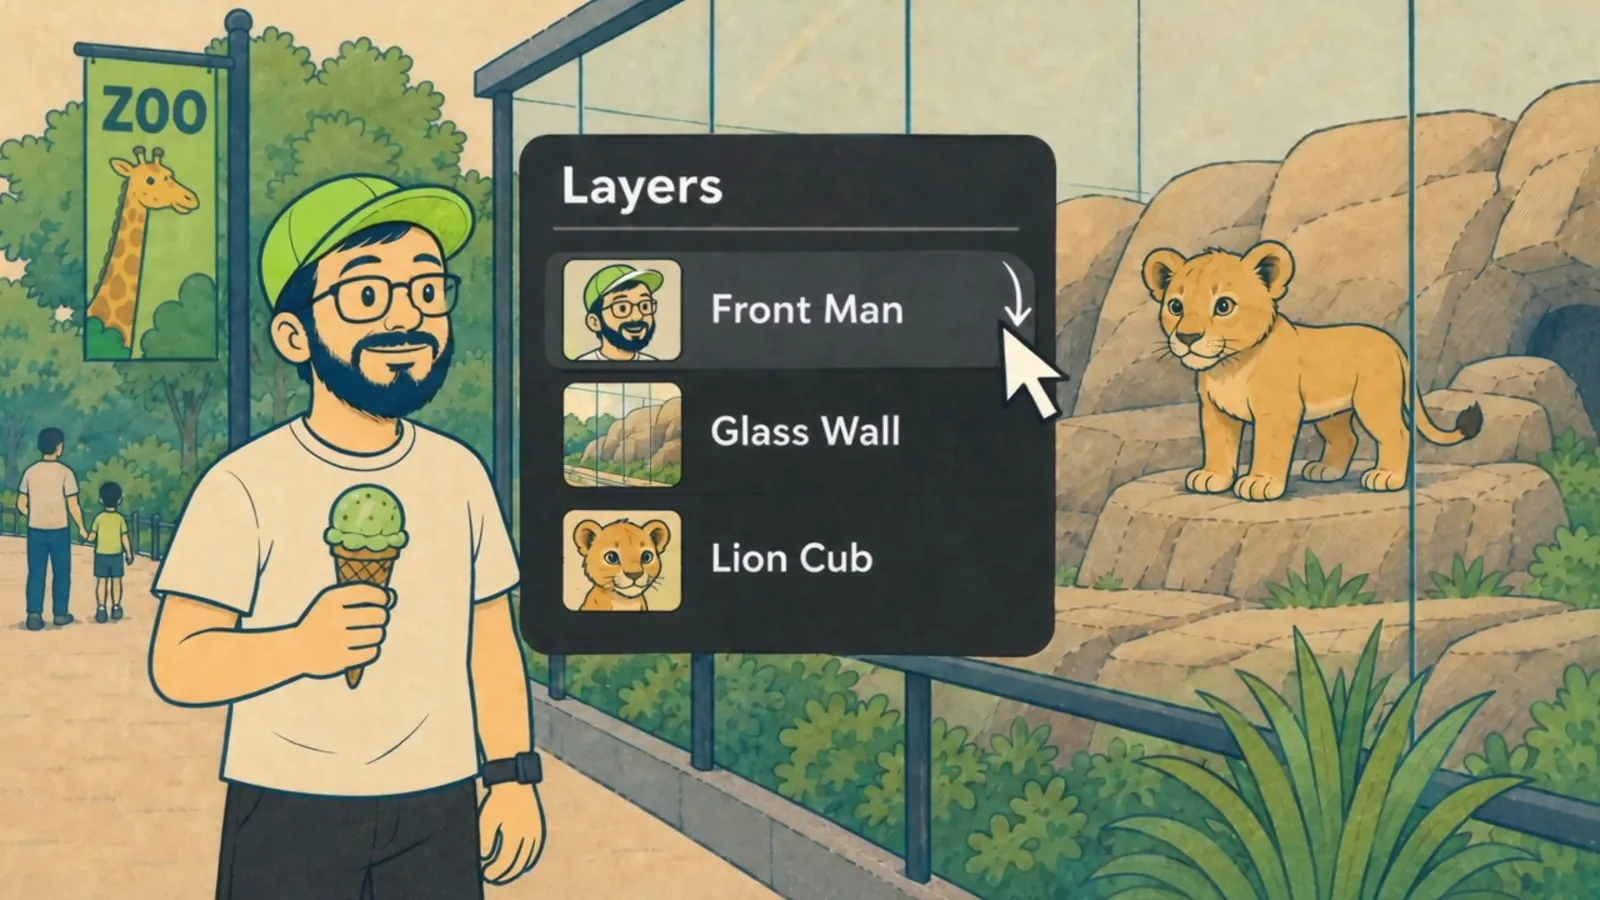
Drag a layer to change what sits in front.
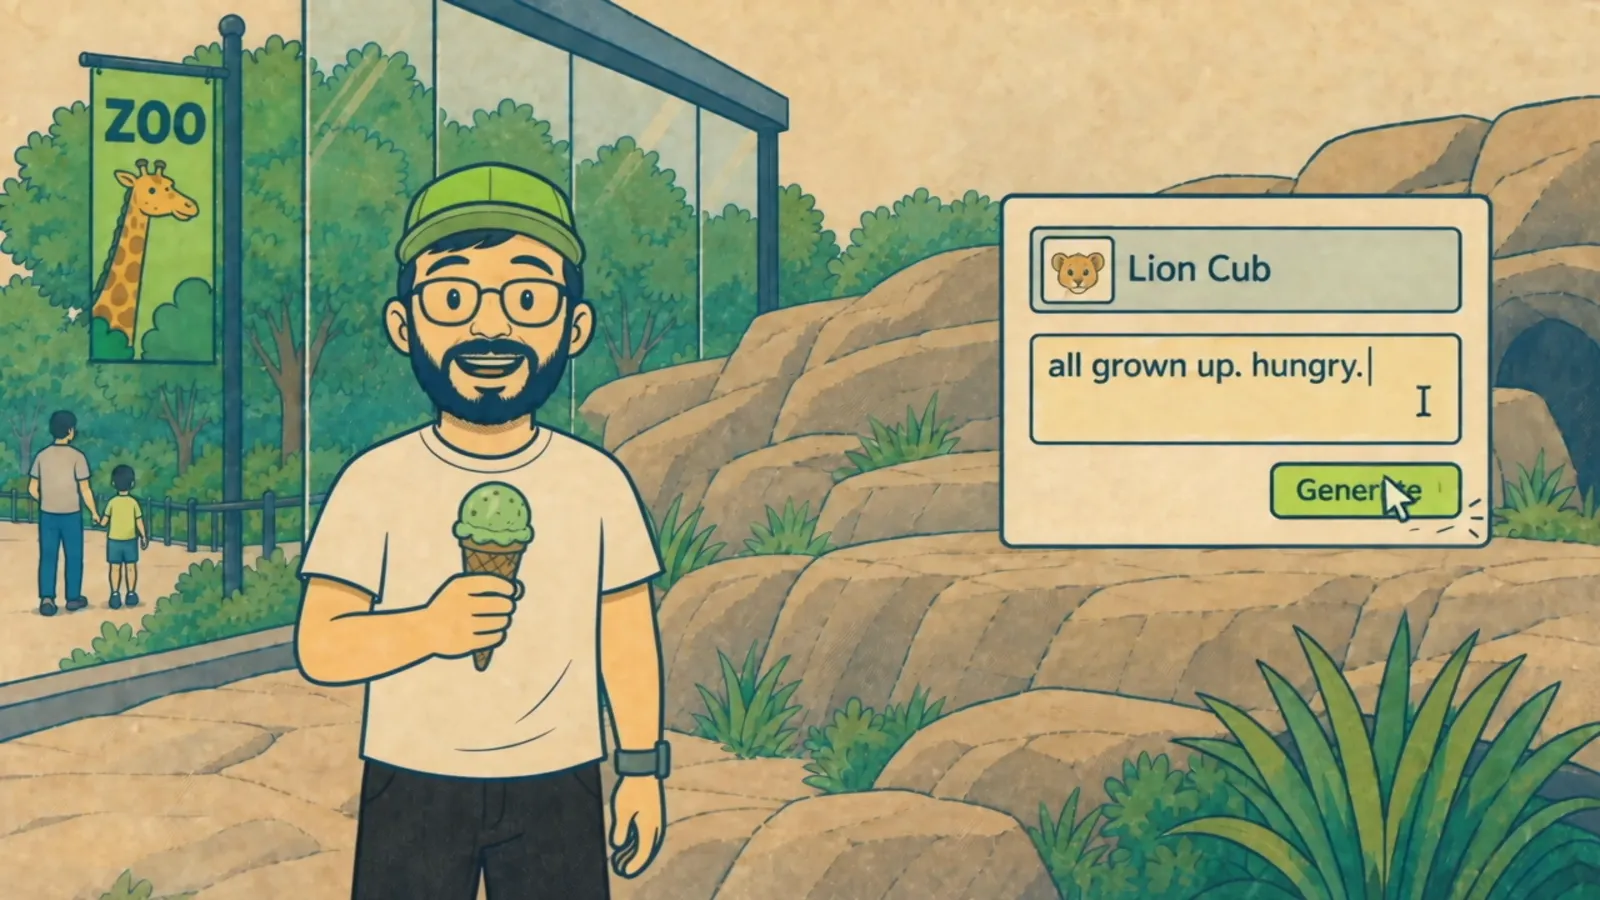
Describe a change, and only that layer is regenerated.
The Task
The goal was to turn one flat image into layers that people can move, scale, rotate, reorder and edit with AI. The team started with a particular model in mind to power the split.
Fraser, one of our engineers, worked with Keenan, our product manager, to quickly build a proof of concept in the browser. That gave us something real to react to early. From there, I joined to help refine the implementation and change the design, building on the structure we already had in the editor.
Actions
Looking back, there are three things I did that shaped how Layers came together:
1. Dialling in the details with HTML prototypes
Some interaction details are really hard to explain in words. How much should a row lift when you pick it up? How quickly should the other rows get out of the way? For this I drew on Josh Puckett's series about “dialling in” details (Interface Craft). A small HTML tool with a few sliders makes it easy to dial in the details you'd struggle to describe.
So I built single-file HTML prototypes for different parts of the design. Each one is a little tuning bench: a stage on one side, the real UI in the middle, and a panel of knobs to play with. Both of these are the actual files, so have a go.
Layer Reorder Tuner
Open full screen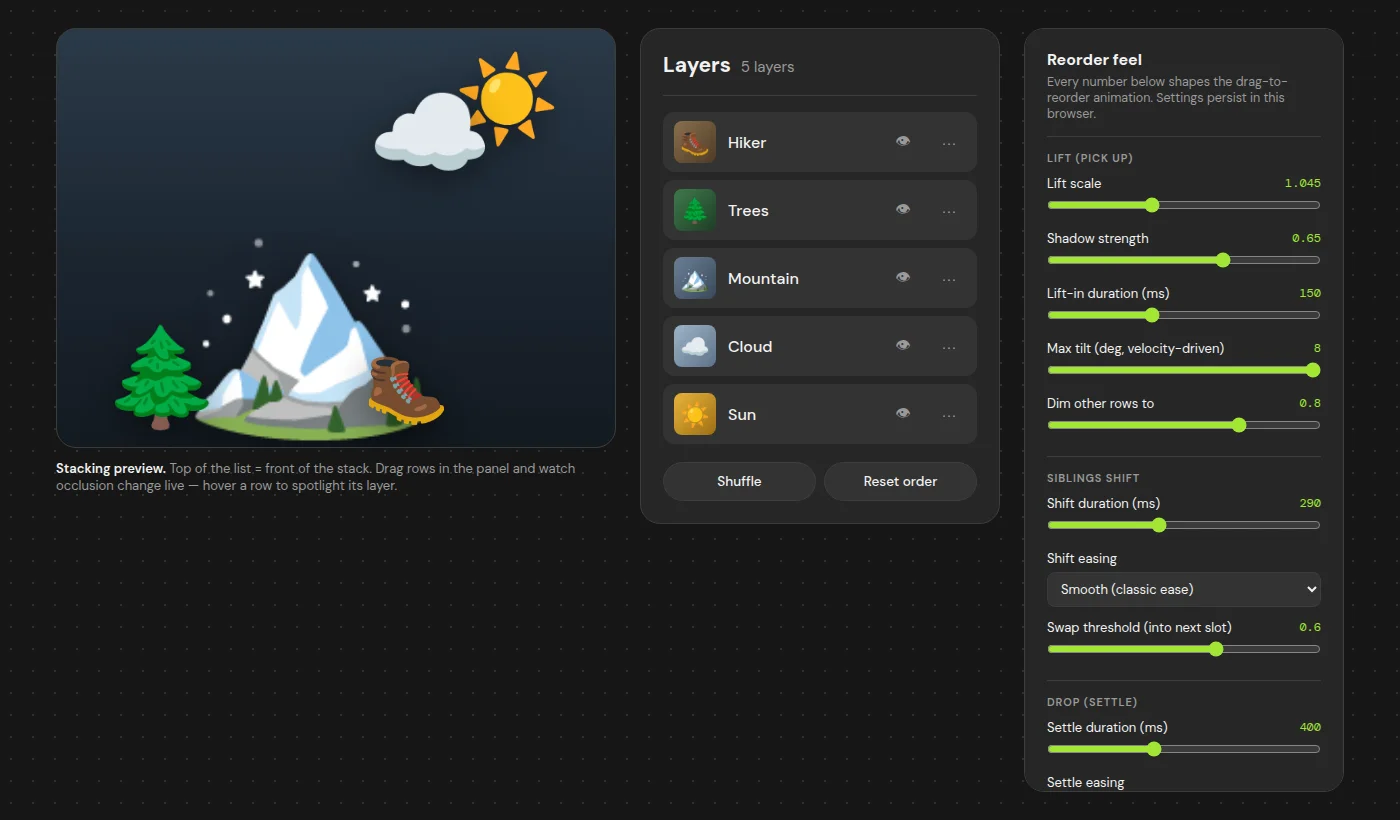
Layers Reveal Tuner
Open full screen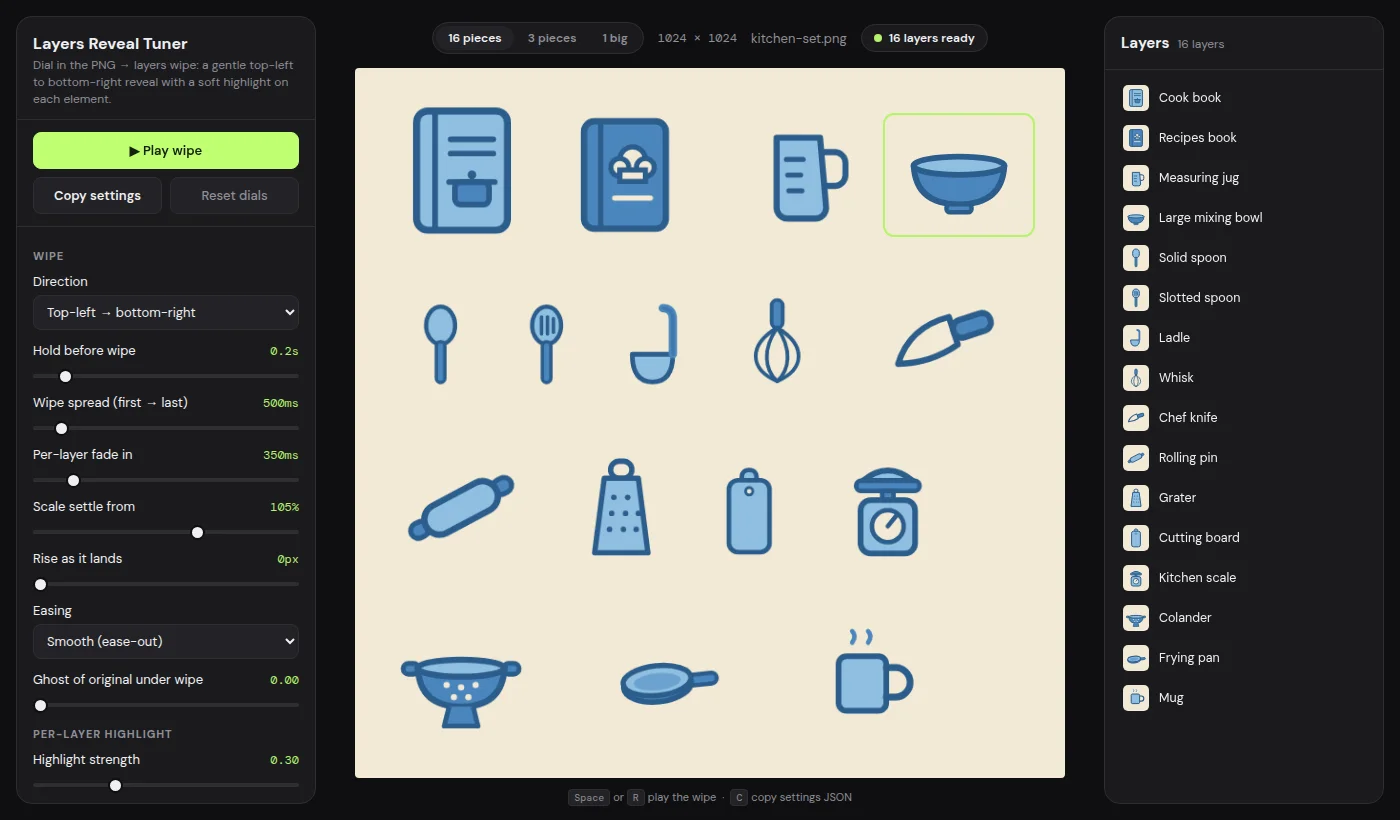
2. Handing the settings to Cursor Cloud Agents
Once a tool was configured the way I wanted, I copied its settings and gave that configuration to Cursor Cloud Agents. The agent did the implementation in our codebase and opened a PR for review.
I really liked how this split the work. Making the design artifact and implementing it stayed separate, so the prototype could stay a quick, playful thing and the PR could be reviewed on its own merits. It also freed me up to spend my time with collaborators on the bigger questions: choosing the right problem, and finding a good solution that builds on the structure we already had.
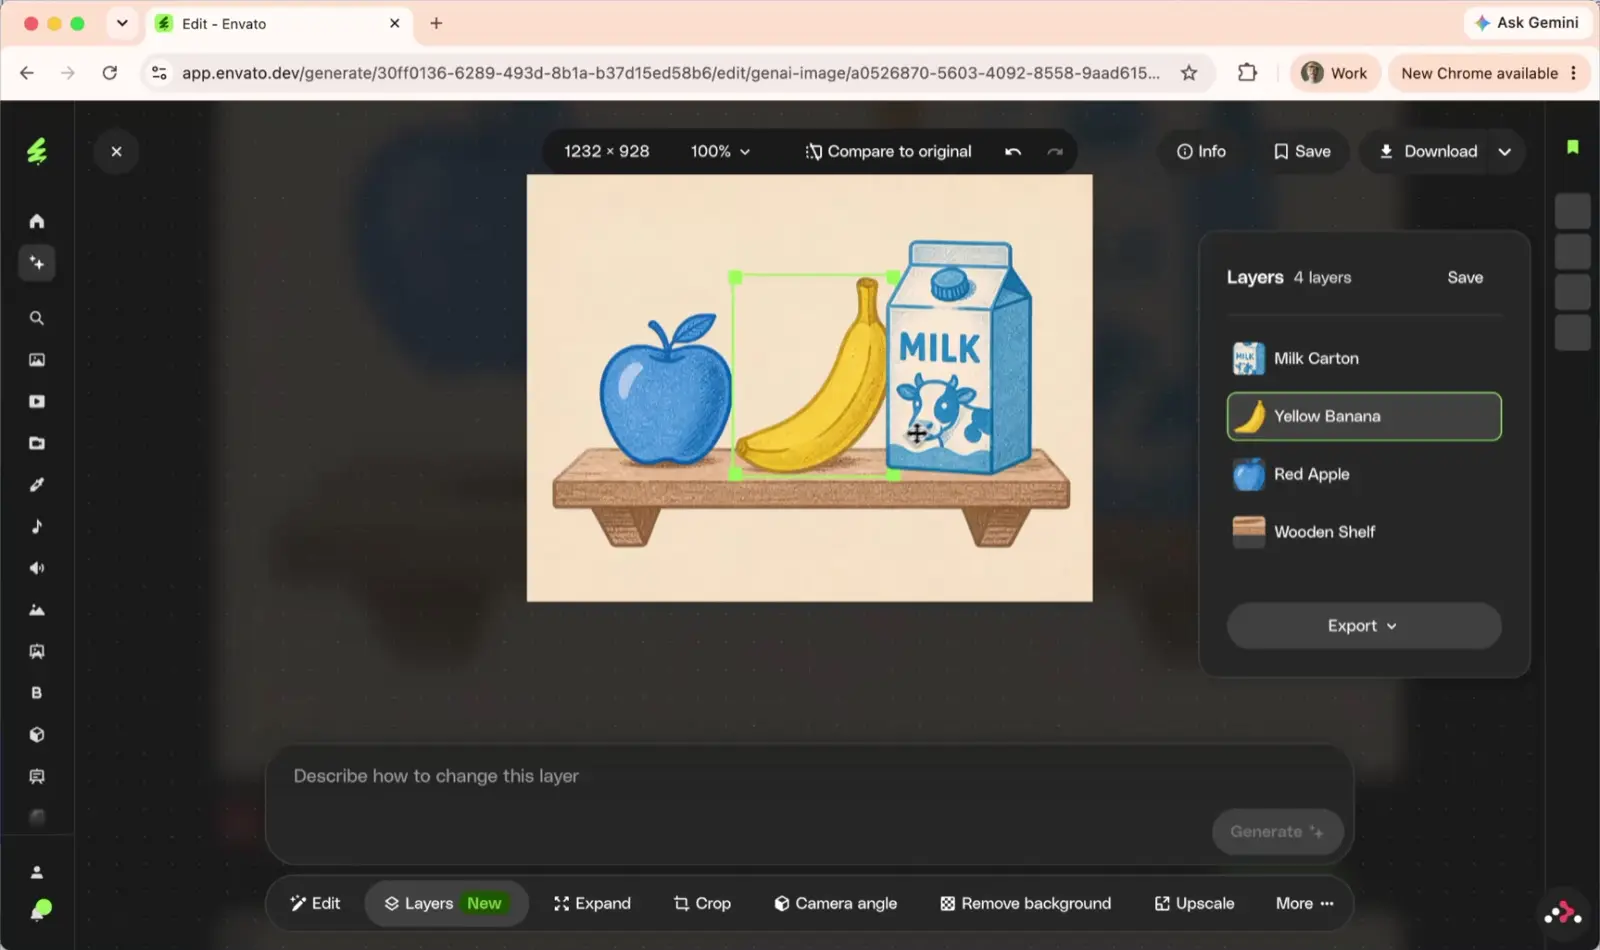
Hovering a layer in the panel outlines it on the canvas.
3. Refining it with the team
It came together quickly. We took it around the team for feedback, and then kept refining. There was a lot of going back and forth, catching small bugs and taking in suggestions, and the feature got better with each round.
Layers in the app: hover a layer, describe a change, and only that layer is regenerated.
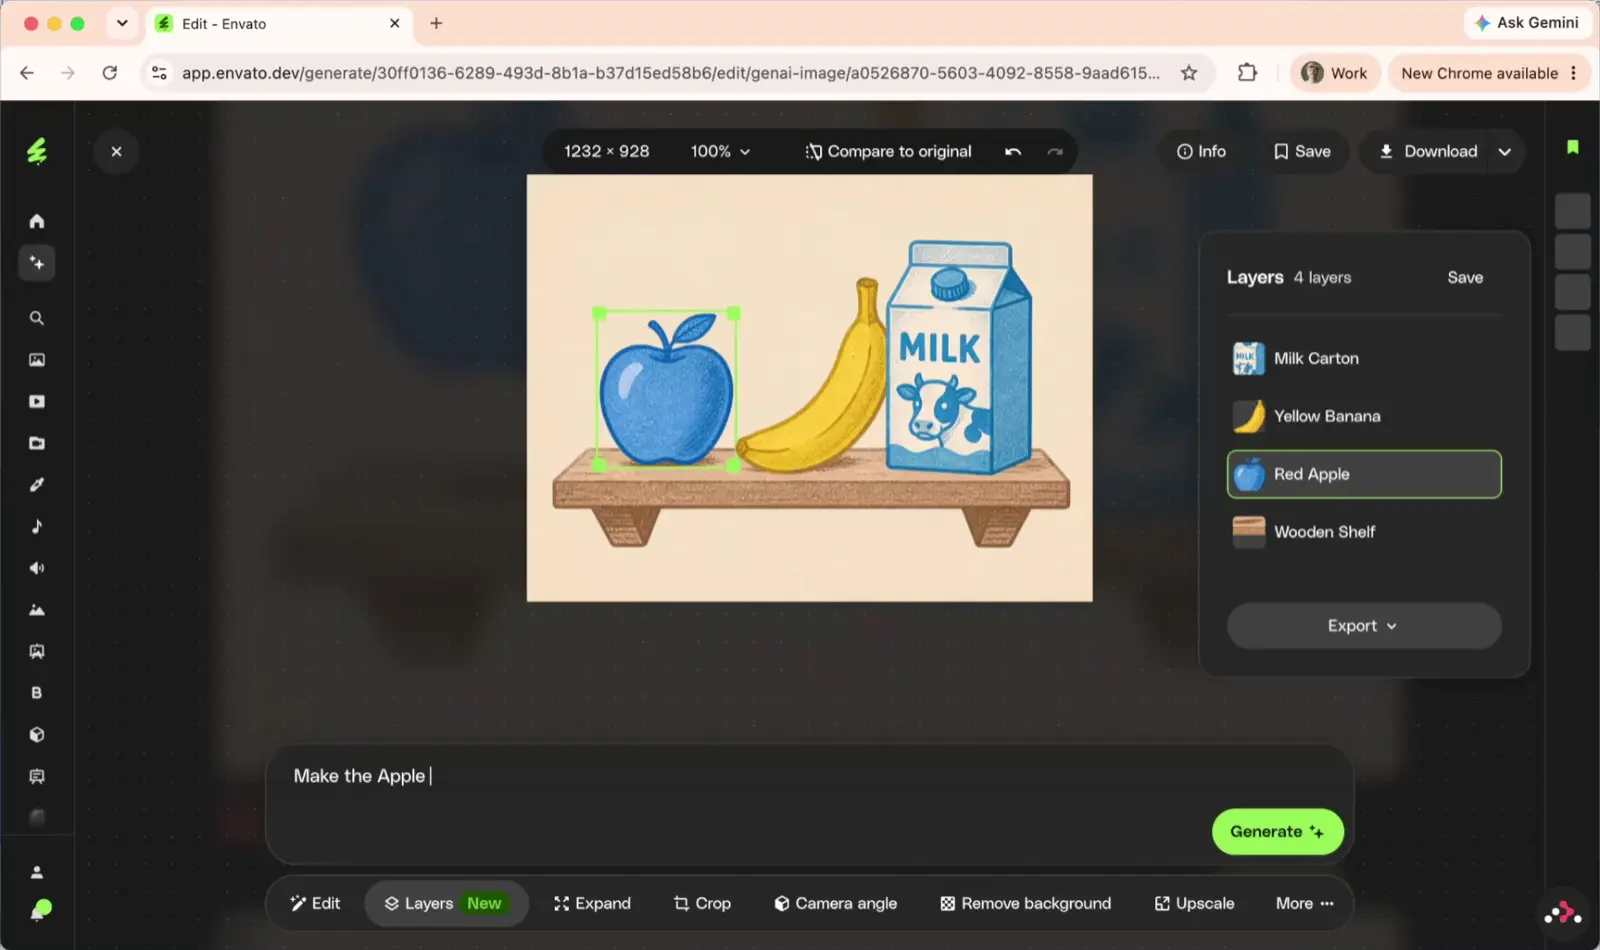
Asking for one change: “Make the Apple red”.
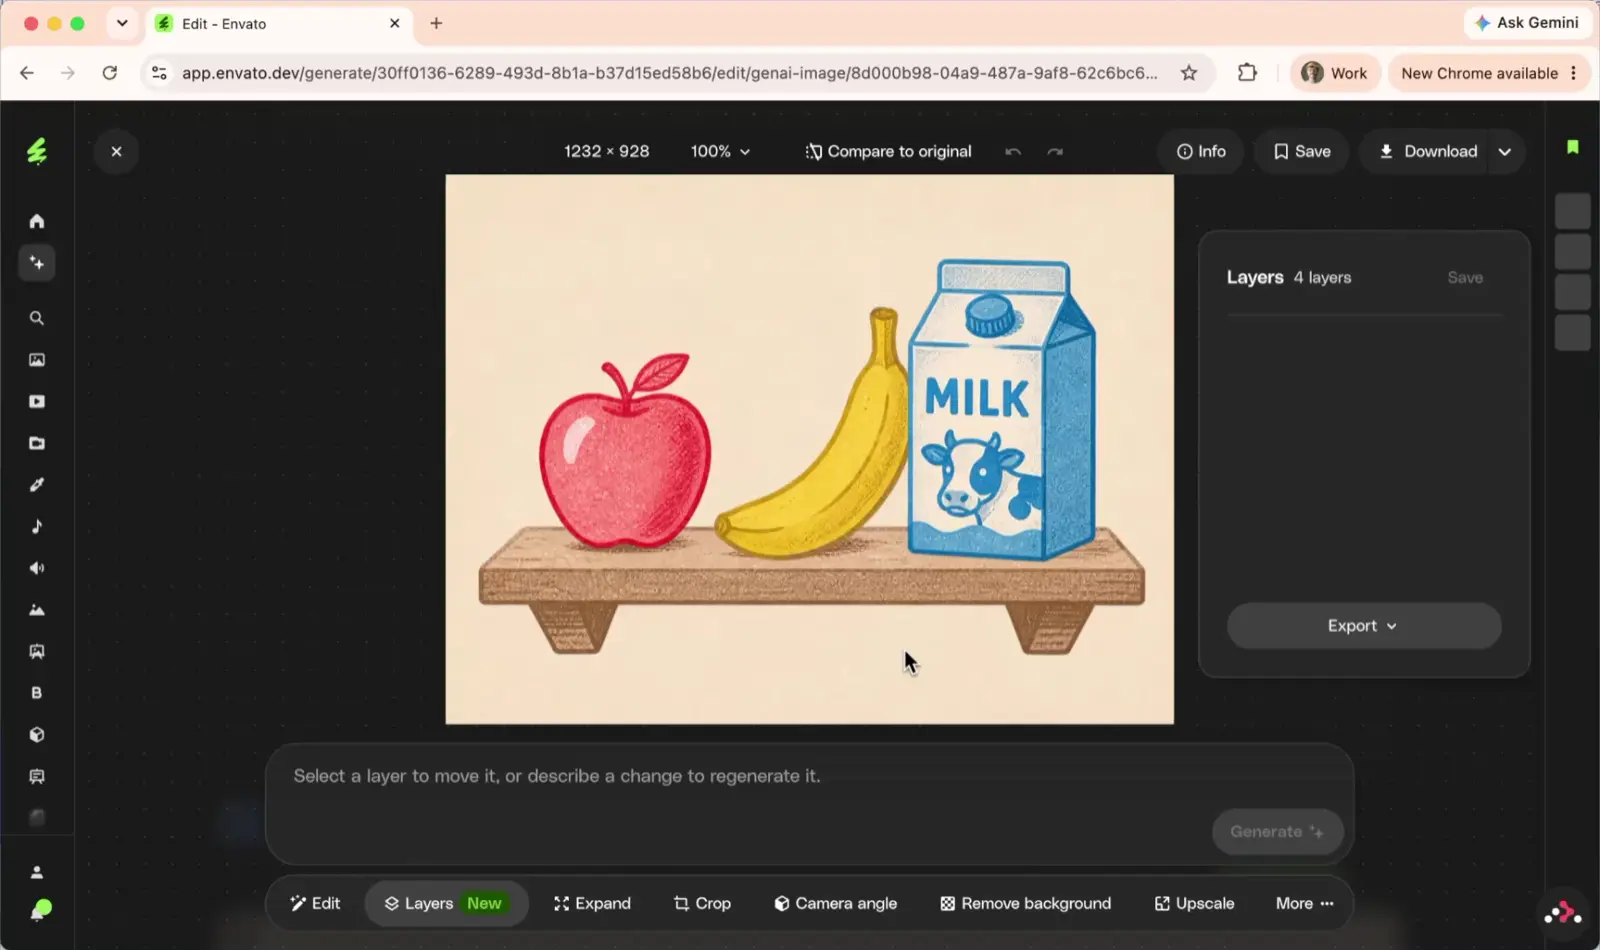
The apple is red, and the rest of the image stays as it was.
Result
Layers launched on Envato.com in August 2026. You can split an image into separate layers, move and rearrange them, and edit one layer with AI while leaving the rest alone. It detects up to 16 layers, and you can export them as PNG layers or as a layered PSD for Photoshop.
For me, the bigger result was the way of working. Tuning details in small HTML tools, then handing those settings to an agent to implement, meant the design decisions arrived in the codebase intact, and I could spend more of my time with the team.
Key Achievements
- Helped ship Layers, a new image editing feature on Envato.com
- Helped refine the browser proof of concept and change the design
- Built HTML tuning tools to dial in the reorder and reveal interactions
- Handed tuned settings to Cursor Cloud Agents, keeping design artifacts and implementation separate
Spreading the word
Once we'd shipped the feature, I made this AI video to share on my social media to promote it. It's a great way to engage users and get people excited about trying the feature, both internally and externally.